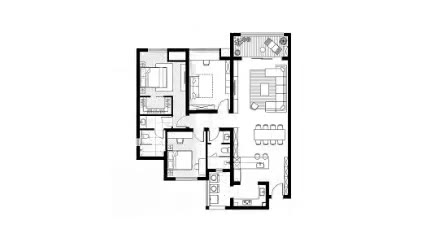
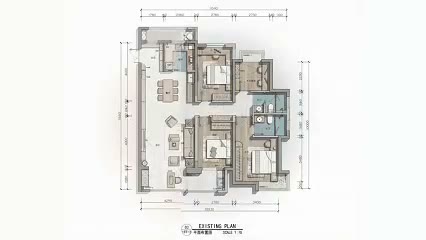
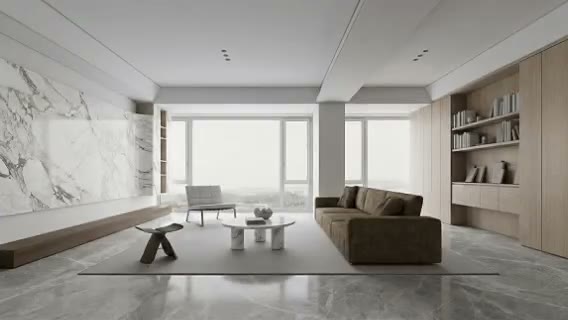
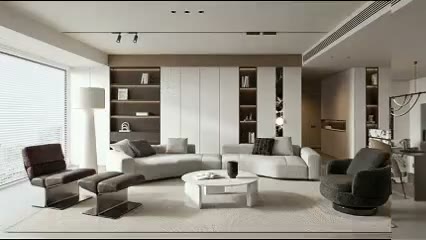
Make a 2D layout spatial
Translate a top-down plan into an axonometric view of walls, rooms, furniture, and circulation.

AI floor plan to 3D · floor plan to 3D
Upload a floor plan and an interior style reference, choose an axonometric angle, and generate a 3D view that reveals room relationships, zoning, and furnishing direction at once.
The demo could not be loaded. The preview and page remain available.
Skill overview
An AI floor plan to 3D workflow converts a two-dimensional furniture plan into a whole-home axonometric view. The system reads walls, openings, functional zones, and furniture placement, then combines those cues with an interior style reference to produce a 3D floor plan.
The goal is not to replace editable professional modeling. It makes an abstract layout tangible earlier, so interior designers can inspect whole-home relationships and home product teams can validate the spatial context for furniture, materials, and styling.
Translate a top-down plan into an axonometric view of walls, rooms, furniture, and circulation.
Understand how living, bedroom, kitchen, and service zones connect in one clear view.
Review axonometric angles, interior styles, and furnishing directions before detailed modeling.
Give clients, design teams, and brand stakeholders a visual reference they can discuss together.
Prepare your input
The production skill uses one clear furniture plan and one interior style reference. Complete layout information and a visually consistent reference make the whole-home axonometric easier to read and more coherent.
Keep walls, doors, windows, and the main room outline visible without cropped or covered areas.
Make furniture and functional areas recognizable enough to distinguish key room types.
Reduce dimension strings, notes, watermarks, and overlapping labels that compete with the plan.
Choose one reference with a clear material, color, lighting, and furnishing direction.
How to use
Prepare the layout and style reference, choose a viewing angle, and generate a whole-home view for design communication.
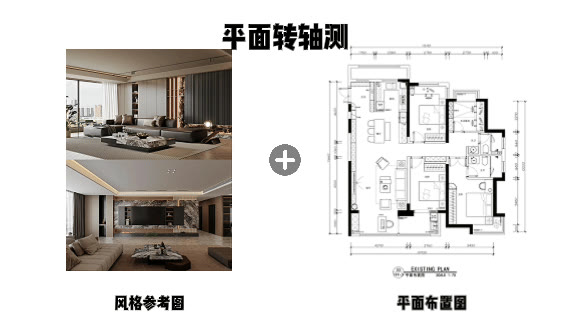
Choose a plan that clearly shows complete walls, openings, furniture, and functional zones. Upload a room reference that represents the target materials, colors, lighting, and furnishing direction.
Select a direction that best reveals the entry, priority rooms, and overall spatial relationships.
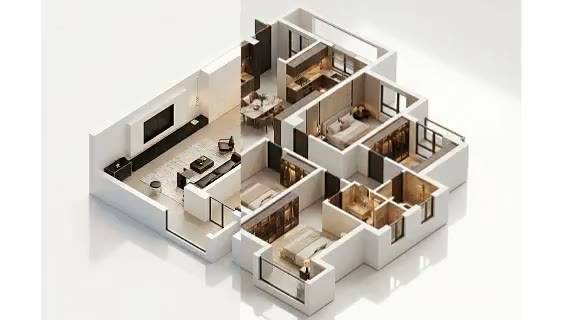
Compare outputs for zoning, room relationships, and style, then continue refining the selected image on the canvas.
Official skill demo
This example is published for this exact skill. It is shown as one complete official reference, not as an independently verified input/output pair or a promised result for your upload.
Capability boundaries
AI infers whole-home spatial relationships from visible structure and layout cues, while the reference image guides visual style. Missing height, dimensions, and construction details still require design judgment.
Important: generated 3D axonometric images are for concept exploration and visual communication. Local doors, windows, furniture, or architectural details may change. Do not use them as construction drawings, dimensional references, or editable accurate 3D models.
Professional tips
Choose the whole-home relationship and viewing angle you need to inspect instead of combining conflicting goals.
Do not remove doors, windows, walls, or key furniture just to make the source image look cleaner.
Treat each output as a candidate and select the direction with the most credible spatial relationships and style.
Before detailed production, verify scale, materials, ergonomics, and real-world constraints.
Use cases
Turn a residential layout into a whole-home axonometric before detailed modeling and align on space and style.
Help non-design stakeholders understand layout, zoning, and furnishing relationships from one 3D view.
Explore spatial contexts for furniture, materials, lighting, and home furnishing products.
Compare scene concepts and compositions before committing to a photo shoot or high-end production.
Choose the right workflow
They serve different stages. AI is stronger for fast exploration; traditional 3D is stronger for precise control and deliverables.
| Dimension | AI floor plan to 3D axonometric | Traditional 3D modeling |
|---|---|---|
| Primary goal | Whole-home review, concept exploration, and visual communication | Precise spatial representation, refinement, and delivery |
| Starting material | A clear furniture plan and an interior style reference | Dimensions, models, materials, and technical information |
| Iteration method | Rapid variations guided by layout, style reference, and viewing angle | Individual edits to geometry, materials, lighting, and cameras |
| Best-fit stage | Ideation, proposals, and early validation | Design development, accurate visualization, and production |
A productive workflow often combines both: use AI to find a direction and build alignment, then move the approved concept into professional modeling and design development.
FAQ
Yes. Plans with complete outlines, readable functional zones, and clear lines are easier to interpret. The production skill also needs an interior style reference to guide materials, colors, and furnishing direction.
All three can be tested. Image clarity and structural readability matter most. Keep hand-drawn walls closed and make sure color fills or labels do not cover important boundaries.
Exact reconstruction is not guaranteed. AI infers from visible cues, so local doors, windows, furniture, and details can change. A designer should review and verify each result.
No. It is best for concept exploration and communication. Use professional design and modeling workflows when exact dimensions, materials, details, and buildability matter.
Teams can see which room contains a product, how adjacent spaces relate, and how furnishing choices work across the home before formal production or photography.
Use a clean plan and a visually consistent style reference, choose a useful axonometric angle, and compare several outputs. Recheck openings, scale, and product placement before detailed production.
Ark AI
Upload a furniture plan and interior style reference, then generate an axonometric view with Ark AI.